
Vegan Korean Kimchi is one of those iconic dishes that everyone thinks they should like right? Trouble is, that when I’ve tried the shop bought ones it just didn’t hit the spot at all. However, my Taiwanese friend, Sophie, wanted to make some and also showed me how to do it. Ok, she’s not Korean – but they’re pretty much next door. Kimchi has numerous gut health benefits: here’s an interesting article on that aspect.
It’s another one of those things that appears steeped in mystery, & the “dark arts of fermentation”. Once you pierce the veil though, it’s really easy. About the only hard part is finding the Korean Chilli Powder (gochujang chilli flakes), & glutinous rice flour. The rice flour is easy – any Chinese or oriental shop will sell it. I’m not so sure about the chilli powder. It really does need to be the authentic kind, or it doesn’t have the classic kimchi taste. I expect it’s available in some oriental mini-markets – but the pack I have came from Taiwan….. You can order it from Amazon in the UK – (link goes here)
It’s all pretty simple. Chop the Chinese leaves (sometimes called Napa or Chinese cabbage). Sprinkle liberally with sea-salt. Add a little water & mix well. Leave for a bit, turning over occasionally. Make the special paste with the glutinous rice flour. Then add all the extra bits to that after you’ve cooked it.
Wash and drain the leaves, add in all the other tasty veggies, and mix well. Pack into a Kilner style sealed jar leaving a bit of space and leave at a cool room temperature for a few days. You can be creative with what you add – there’s plenty of choices.
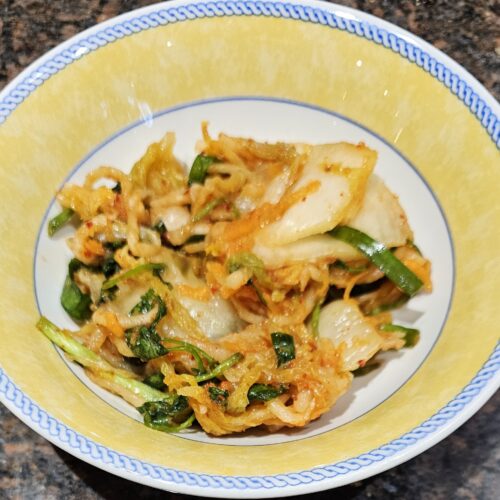
Put it in the fridge and enjoy your vegan Korean kimchi as a snack or as an accompanyment. It can be eaten with Aubergines in Blackbean Sauce, Tofu & Green Chillies or pretty much any far eastern cuisine. But not Thai food I would suggest. I have to say, when you make it yourself, it has a whole different level of complexity & tastiness. I can see how people can easily get addicted to it. My microbiome is going to be so healthy from now on! If I’m peckish, instead of a biscuit, I have a small bowl of kimchi!
Vegan Korean Kimchi
Equipment
- 2 2 litre Kilner style jar
- 1 11 litre stainless steel pan or similar
- 1 potato masher or similar implement
- 1 ½ litre Kilner style jar
Ingredients
The chopped or grated veggies
- 2300 g Chinese leaves about 3 medium sized heads or 2 large ones.
- 250 g grated mooli/white raddish half a medium sized one
- 200 g grated carrot 1 medium
- 75 g Chinese chives optional but nice.
- 50 g spring onions roughly 3 or 4 whole spring onoins - optional
- 30 g corriander a standard bag - optional
- 7 g dried seaweed - hijik or wakame or kombu optional - but soak the night before - use the soaking water for the kimchi paste
- 150 g conference pear or similar you can use apple too
- 70 g sea salt - roughly 5 tablespoons you can use table salt, but sea salt gives a better flavour and is healthier.
- 100 g filtered water put in a sprinkler jar - not strictly necessary
The kimchi paste
- 30 g glutinous rice flour
- 30 g muscovado sugar to kick-start the fermentation
- 200 g yellow onion a medium sized one.
- 60 g garlic 2 bulbs approx
- 45 g ginger good thumb sized piece
- 50 g Korean red pepper powder gochujang chilli flakes
- 30 g vegan fish sauce Thai Taste brand is available in Waitrose
- 300 g filtered, bottled or boiled cooled water
- 10 g seaweed flakes optional
- 10 g miso paste - preferably white 2 flat teaspoons - optional - may overpower
Instructions
- You can use quite a variety of vegetables, as long as the chinese leaves predominate.

- If you're planning to use seaweed, put it on to soak the night before.
- thoroughly clean the large pan before use
- Cut the Chinese leaves in half, and remove the very solid section at the base, and then cut into 3rds along the length,
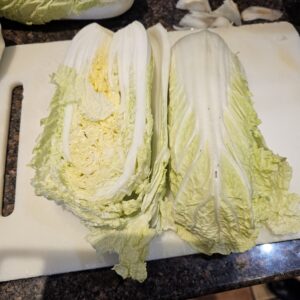
- Then chop into 5 starting at one end. Cut them at an angle so the cut edges are chamfered. This improves the mouthfeel.

- Put into the pan, scrunching it to separate the leaves as you do. Sprinkle liberally with the sea-salt. If you're using sea-weed, you can add it at this point.
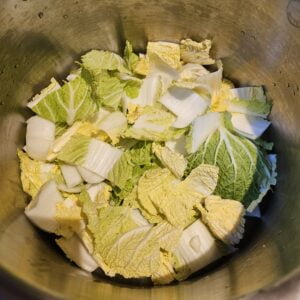
- keep on going until you have nearly filled the pan - there should be a bit of space at the top.

- sprinkle 350g of the water on top, preferably bottled, filtered or boiled water so as to not interfere with the ferementation. Chlorine in the municipal water supply will inhibit the natural fermentation. Cover and leave. Turn over every 20 minutes or so.
- weigh the 20g of rice flour & 35g of sugar into a smallish pan, and add enough water - around 250 mil to make a light liquid. Add a little of the water at first and break all the lumps up with the back of a spoon. After that you can add the rest of the water. The sugar is to help feed the fermentation

- Bring to the boil slowly, stirring all the while until you have slightly gloopy, but not too thick (or thin) sauce. Allow to cool a bit before the next step.

- Add in the 30g of red pepper powder and stir. Leave to cool.

- While the rice flour & sugar sauce is cooling, peel the onion, garlic and wash the ginger. Add it all to a food processor along with the miso if you're adding that.
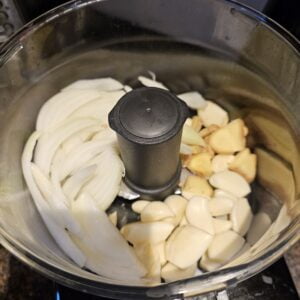
- Pulse blitz it until it's nice and fine - it will be quite wet.

- grate the mooli/white raddish as well as the carrot, in a food processor (or hand grate).

- in about 2 to 3 hours, a lot of water will have come out of the leaves and they will have shrunk quite a bit. Half fill the pan and stir well, then drain. Repeat 2 more times. You need to have washed most of the salt off or it will be too salty.
- at this point you can either wring it with your hands or pummel it a bit - not too much though - with a potato masher or the base of a large jar.
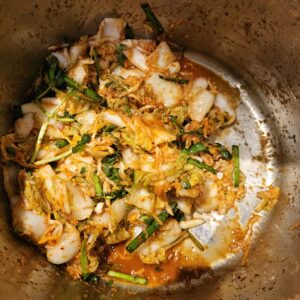
- pour off any excess liquid, released by the squeezing, and add in the grated/chopped other veggies and add the chopped corriander and Chinese chives......

- Once the rice mixture has cooled to room temperature add in the blitzed garlic, onion, ginger and also the 30g of fish sauce, stirring well to combine

- add the sauce to the veggies in the main pan mix to combine everything stirring it very well to distribute the sauce evenly into the veggie mixture.
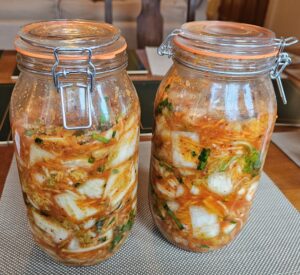
- spoon the resulting mixture into the 3 litre jar. There should be a 3 to 5cm space at the top. Level the surface and close the lid with the spring catch.

- place in a cool, but not cold room - it wants to be 16°C to 18°C. Leave it there for 3 to 5 days or so, then place in the fridge. It can be eaten after the initial 3-5 days but is better with a more complex taste after 7 days in the refrigerator. The flavour will continue to improve or develop, but after 4 to 6 months it will start to become sharp/bitter so it is better enjoyed before that point is reached.
Notes
- non-vegan kimchi includes fish sauce and shrimp paste. But clearly a vegan version doesn't use them. However that umami taste is easily and better replaced with seaweed, and miso and/or vegan fish sauce.
- some recipes suggest fermenting at a higher temperature for a little longer.... I'm still experimenting. My current method works well, although everything (almost) can be improved.
- This works best in a large (3ltr) Kilner style jar, but to use it on an everyday basis, I think it works best if you decant some into a smaller kilner jar to keep easily accessible in the main refrigerator.


2 Responses
Amazing, delicious
Great – so glad you liked it – let me know how you get on with it.